Printing on macOS
SCS Computing Facilities (SCSCF) provides support for public printing for our three supported desktop computing platforms (Windows, macOS and Linux).
There are two methods of configuring public printers on macOS:
- JAMF: SCSCF-supported Macs that are registered for software support can use our 'Self Service Software' platform to install available printers automatically.
- Manual Configuration: For unsupported Macs, we provide manual configuration instructions. This method requires that necessary drivers be installed. You can download the drivers from the Konica-Minolta website if using this method.
Add an SCS printer using Self Service Software (JAMF)
Supported SCSCF Macs feature 'Self Service Software', an application which allows convenient automatic configuration of SCS printers.
-
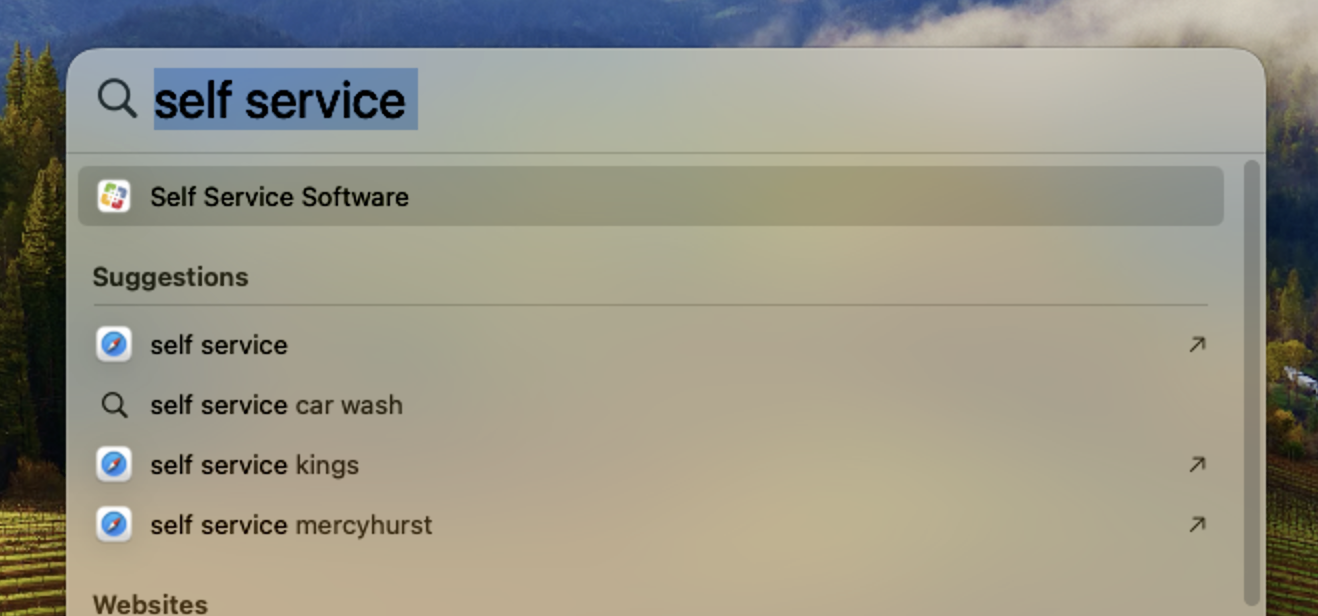
Locate and open 'Self Service Software' (search via Spotlight or Applications in Finder)
-
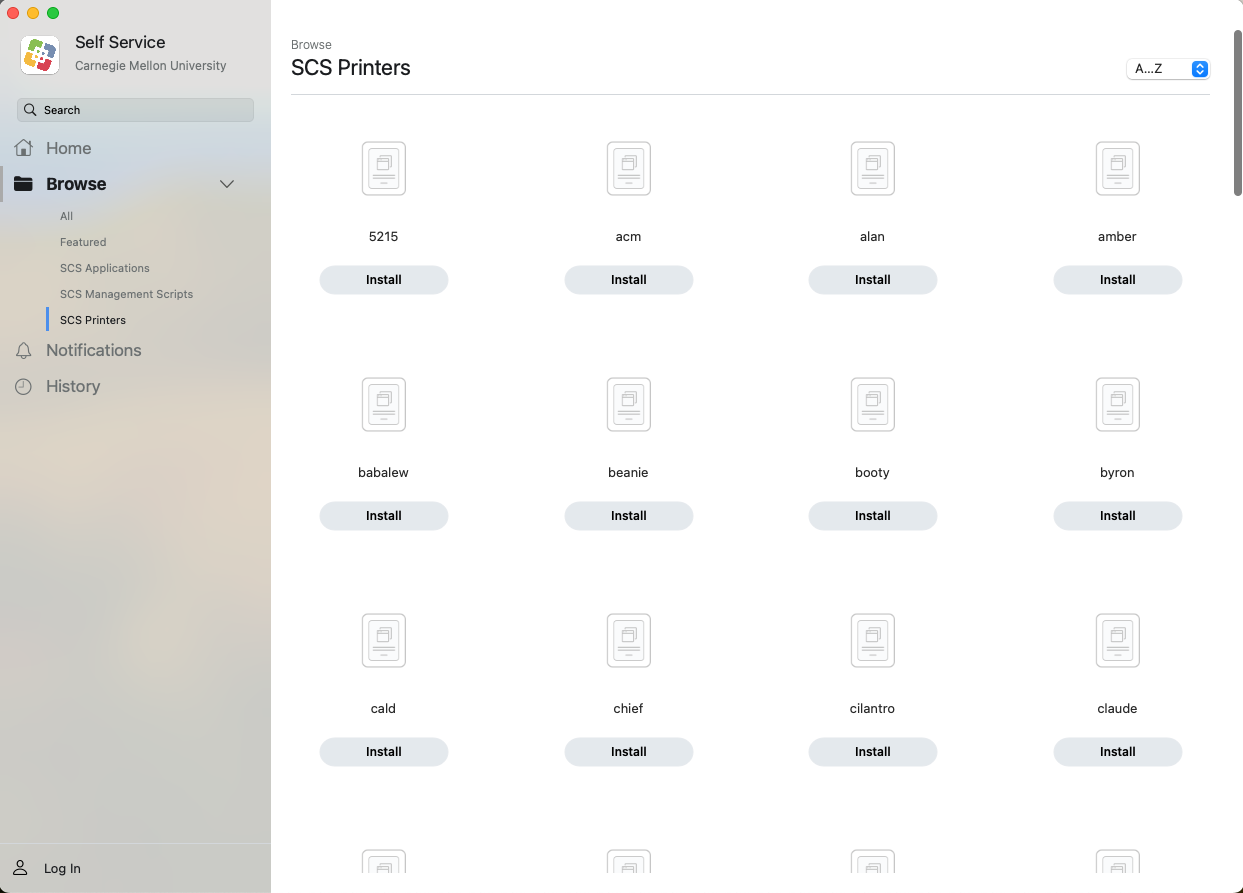
From 'Self Service Software' window, select "SCS Printers" from left-hand menu.
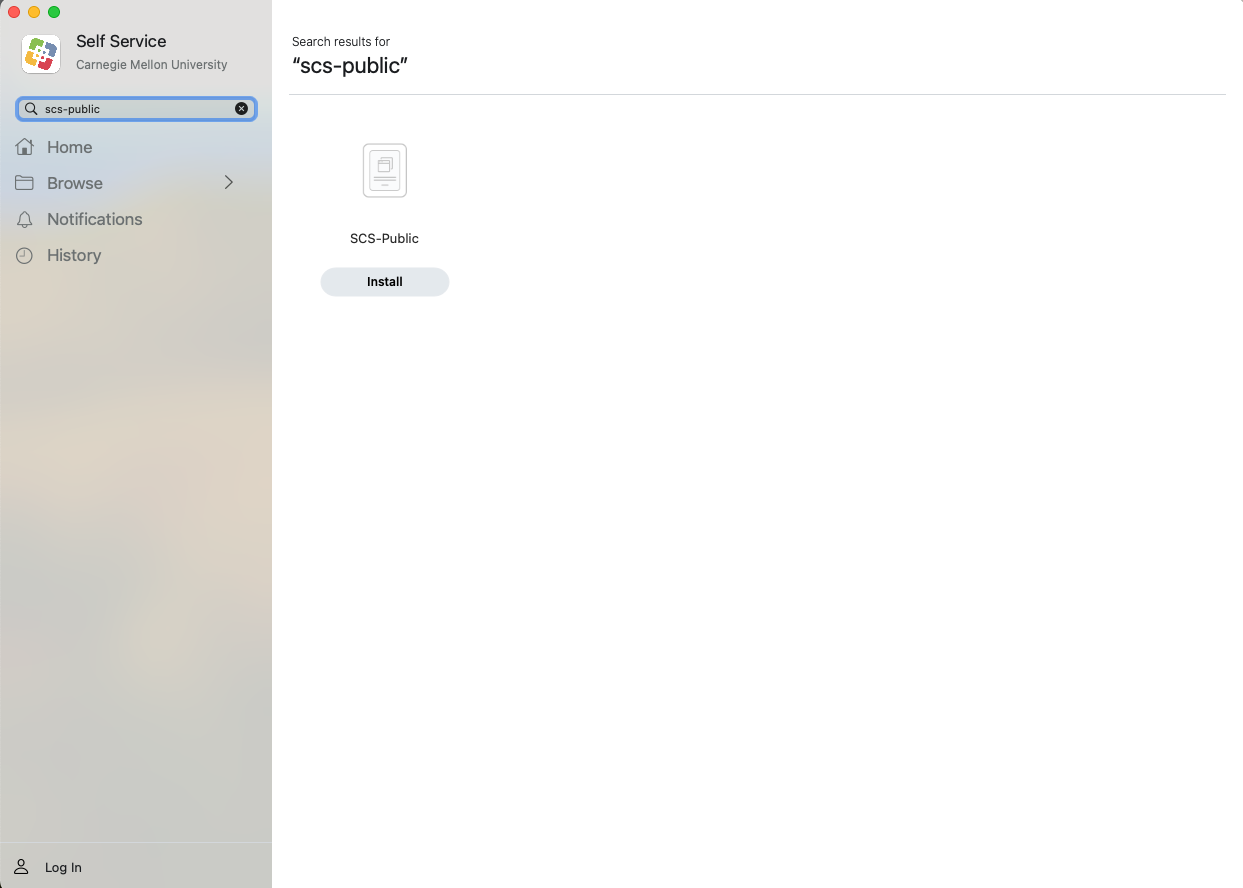
Click on the search field and enter 'SCS-Public'.Public Printing: Install SCS-Public policy
Private Printing: Install the policy name for your private printer
-
Click 'Install' under SCS-Public.
Please note: for public printing you want SCS-Public. For private printers select the policy matching your private printer name. If you do not know the name of your private printer, submit a ticket and we would be happy to assist you.
-
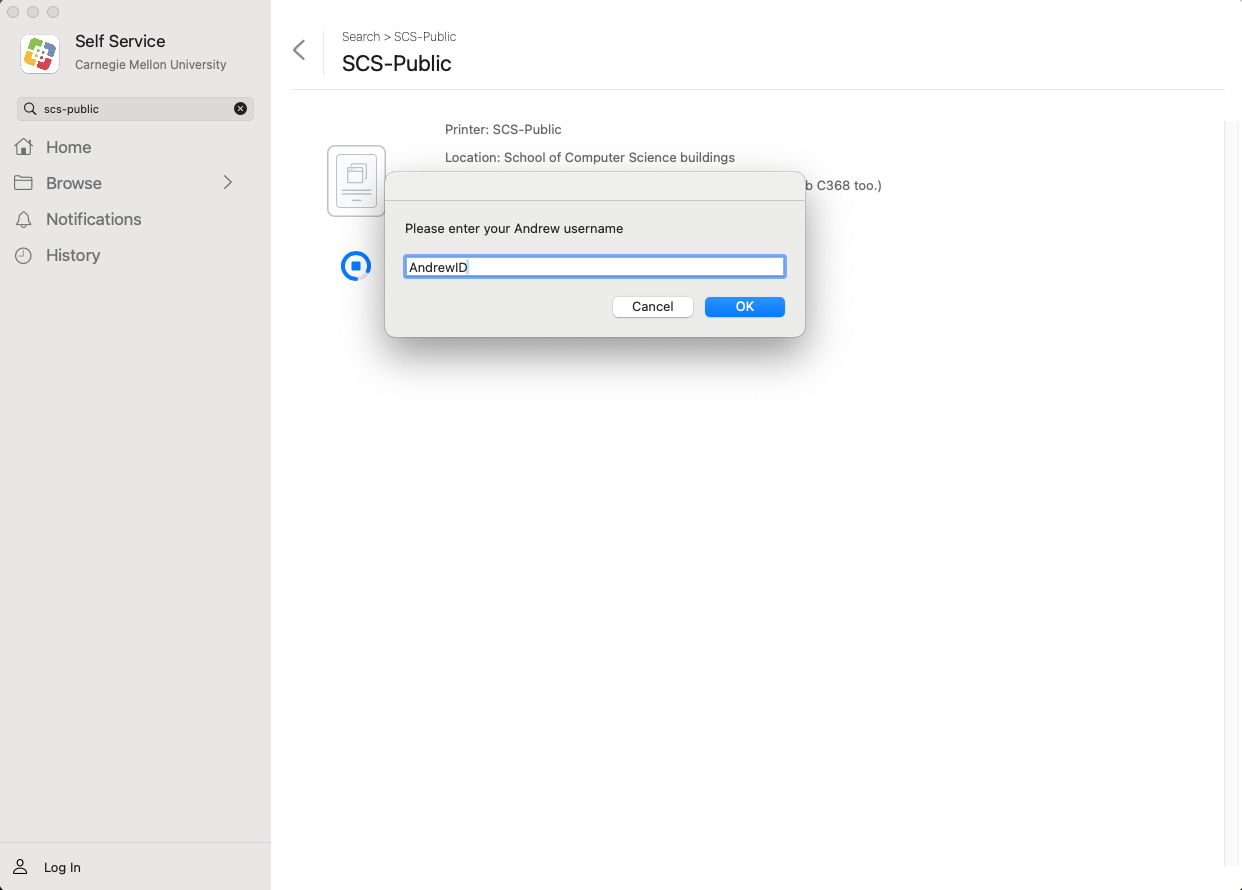
Type in your Andrew ID when prompted. When the install is finished it will briefly say 'Done' then 'Reinstall'.
You have installed the printer successfully.
Add an SCS printer manually (unsupported Macs)
If your Mac is not enrolled under SCSCF Software support, or is not enrolled in the JAMF Software Server you may add printers by following the steps below. If adding a private printer, you must know the name of the printer. Please submit a ticket, if you do not know the private printer name.
Download Konica Drivers (for non-JAMF manual configuration only)
-
After downloading the Konica Driver Package ZIP file, uncompress and install the package.
Please Note: The package file will be located where you extracted the zip file:
(Saved Location):
Downloads/C759_C658_C368_C287_C3851_Series_v11.8.0A_Letter/C759_C658_C368_C287_C3851_11.pkg
-
Select 'System Settings' from the 'Apple' menu at the top left hand corner of the screen on the menubar.
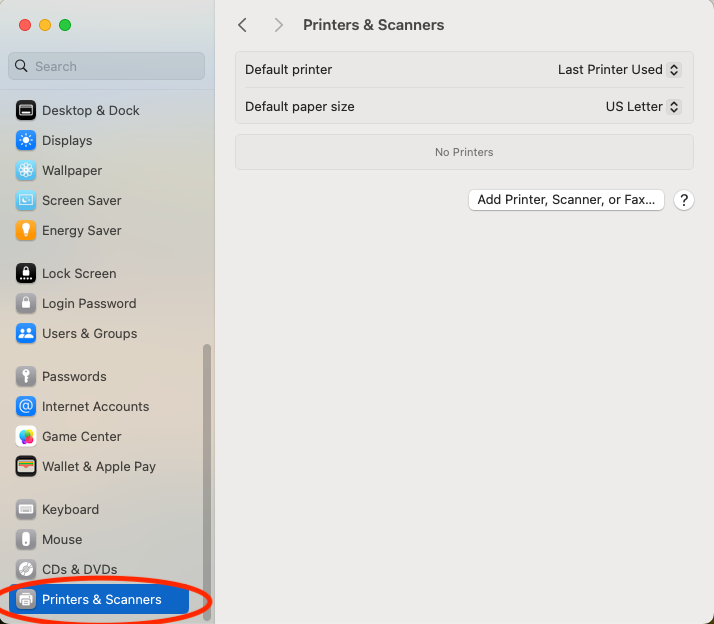
On the left sidebar scroll down to "Printers & Scanners"
-
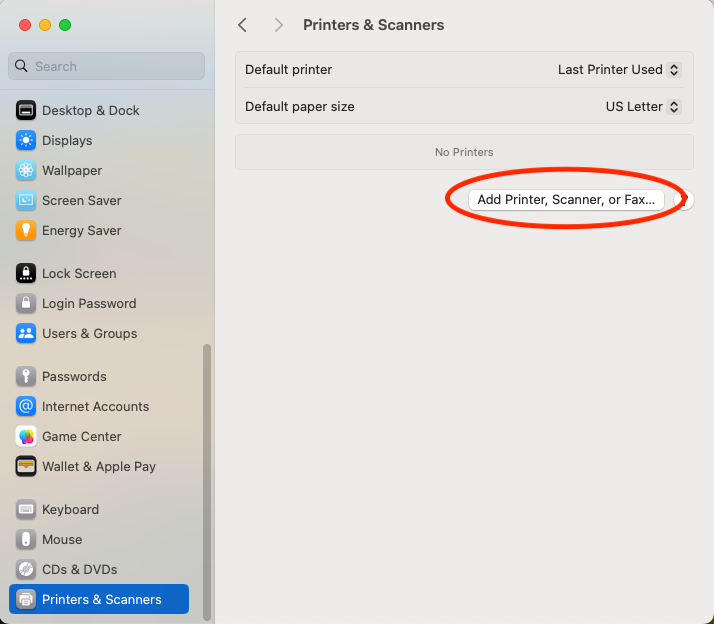
From the Printers & Scanners pane, click on the 'Add Printer, Scanner, or Fax...' button on the right side of the pane.
-
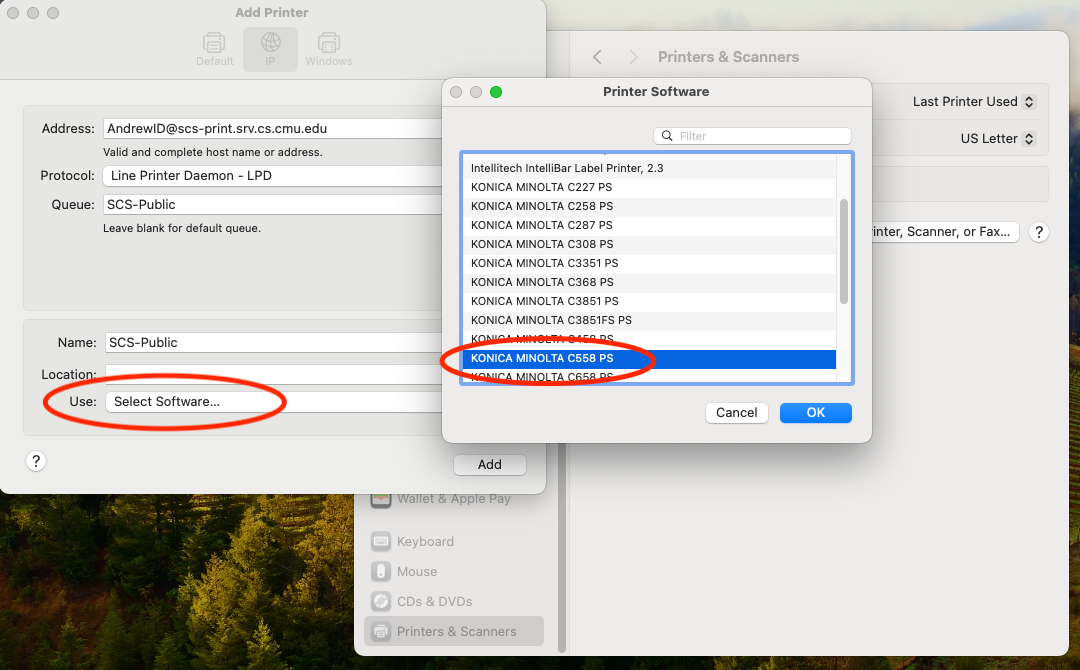
Under the IP tab, select the following options:
Address: AndrewID@scs-print.srv.cs.cmu.edu (replace AndrewID is your AndrewID)
Protocol: Line Printer Daemon - LPD
Queue: SCS-Public (or your private printer name)
Name: SCS-Public (or your private printer name)
Location: (printer location or leave blank)
Use: Click dropdown and click Select Software
Select: KONICA MINOLTA C558 PS, click OK and Add.
Note: For private printers, you may be able to use a generic driver, such as the Apple generic postscript driver. However, some printers may require the driver package provided by the vendor.
-
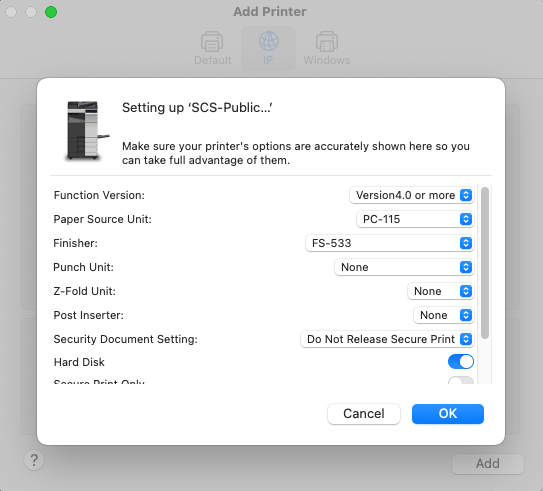
Enter the following configuration information: (if not already defaulted)
Function Version: Version4.0 or more
Paper Source Unit: PC-115
Finisher: FS-533
Punch Unit: None
Z-Fold Unit: None
Post Inserter: NoneHard Disk: Checked
Secure print Only: Unchecked
Allow Public User: Checked
Paper Setting for Each Tray: UncheckedOnce completed, click OK.
Note: Private printers will not present these options.
-
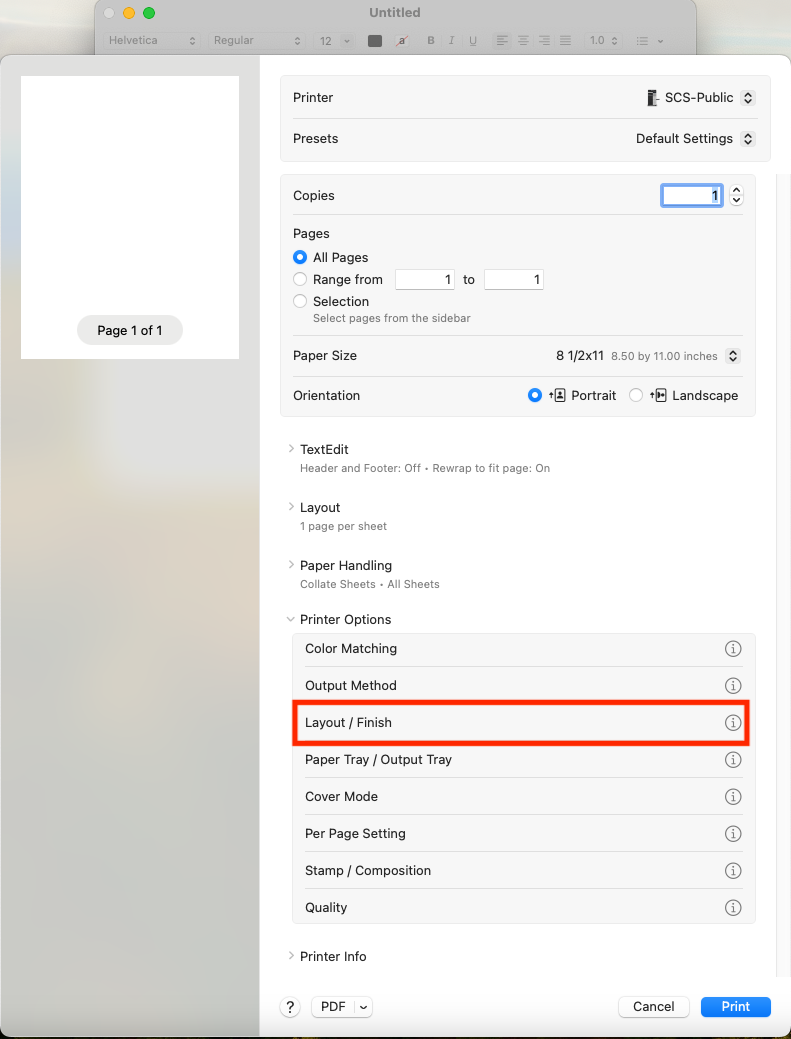
For finishing options (including stapling and two sided printing), when printing check the following settings:
In the print window:
Click to expand 'Printer Options'
Click the i icon to the right of Layout / Finish
Print Type: 2-Sided
Binding Position: Left BindClick Ok then click Print.
Note: Private printers will not present these options.

Need Help?
Was this page helpful?
Use this box to give us feedback on this webpage and its content. If you need a response, please include your Andrew ID.
Need technical support? Submit a ticket