SCS Printing on Windows 11
SCS Computing Facilities uses a centralized print service, where you print to one queue and then release the print job at the printer.
Add an SCS printer (via Windows Control Panel)
These screenshots illustrate the User Interface (UI) of Windows 11. Screenshots and instructions for Windows 10 can be found here.
-
If you are using an SCSCF-managed Windows computer, authentication will be handled by your normal Windows login, so you can skip this first step.
If you are using a personal Windows computer, you may need to map a network drive in order to cache your Andrew credentials before you can add a printer:
- Open a File Explorer window (accessible via the start menu)
- Right-click on This PC or My Computer in the left hand side bar.
- Choose Map network drive... from the drop down menu.
- Select a drive letter in the Drive box.
- In the Folder box, type the path for server and shared resource in the following format:
\\scs-print.srv.cs.cmu.edu\print-auth
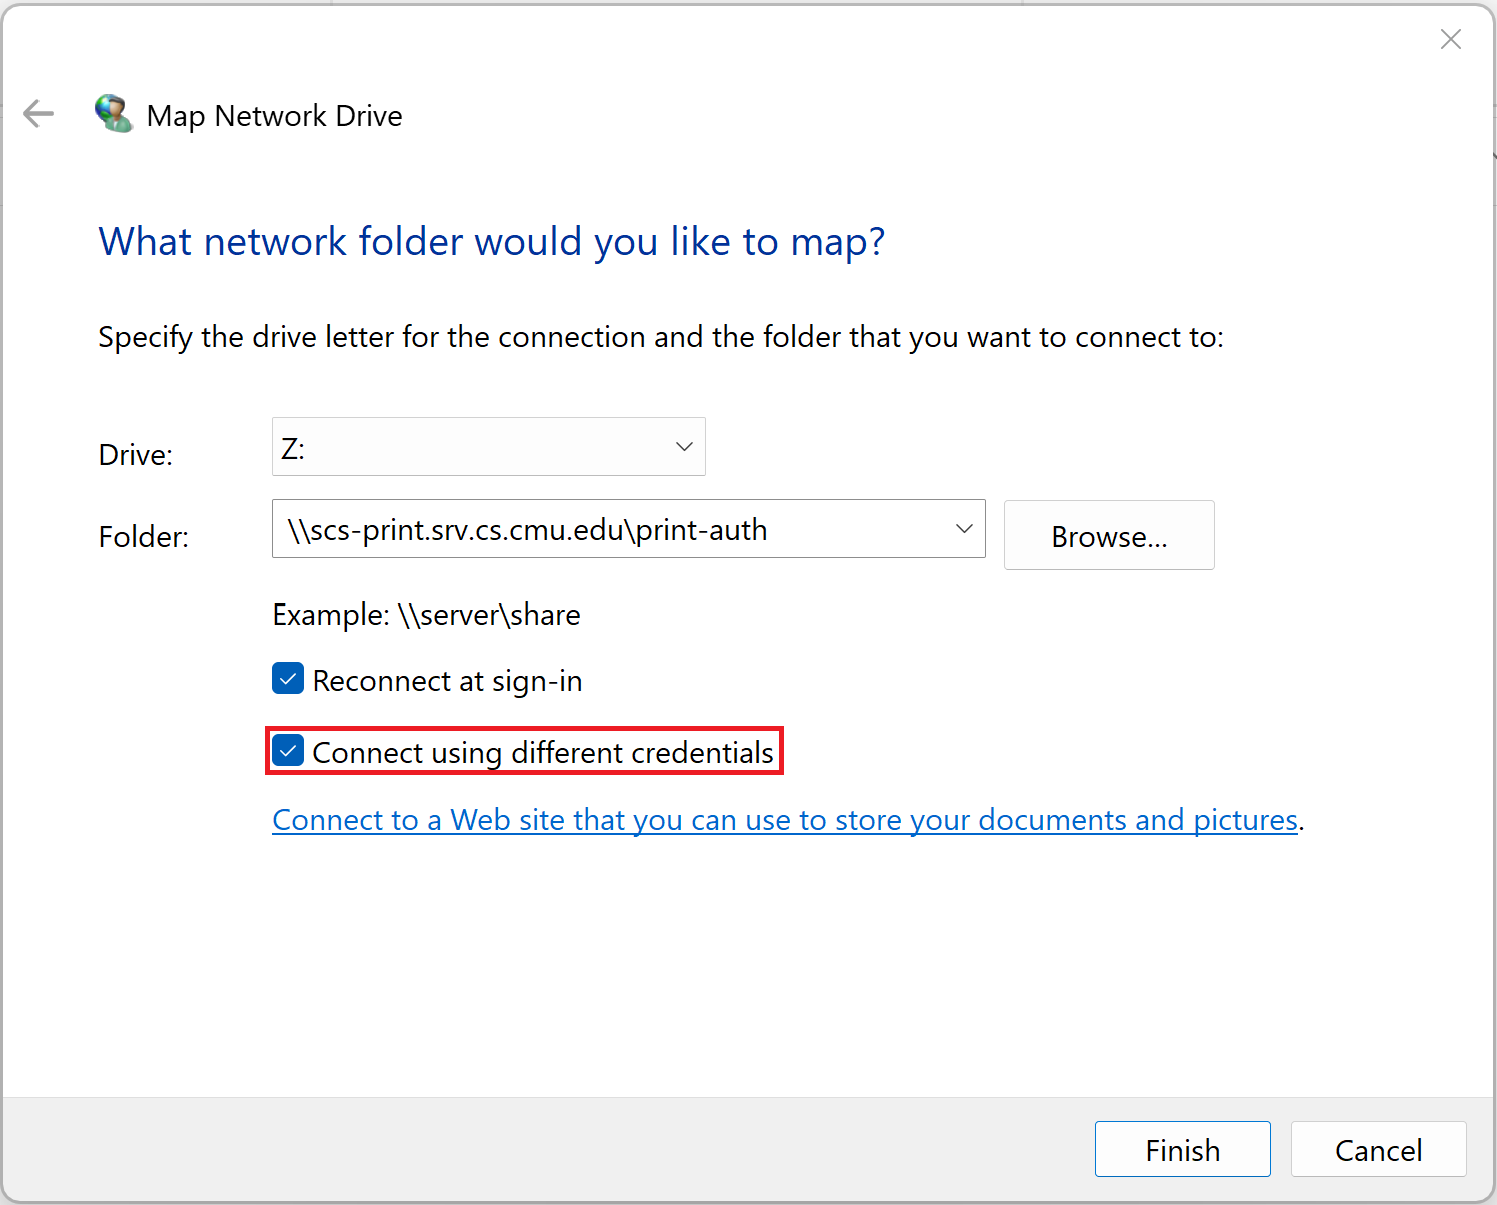
- Select the checkbox that says "Connect using different credentials".
- Select Finish.
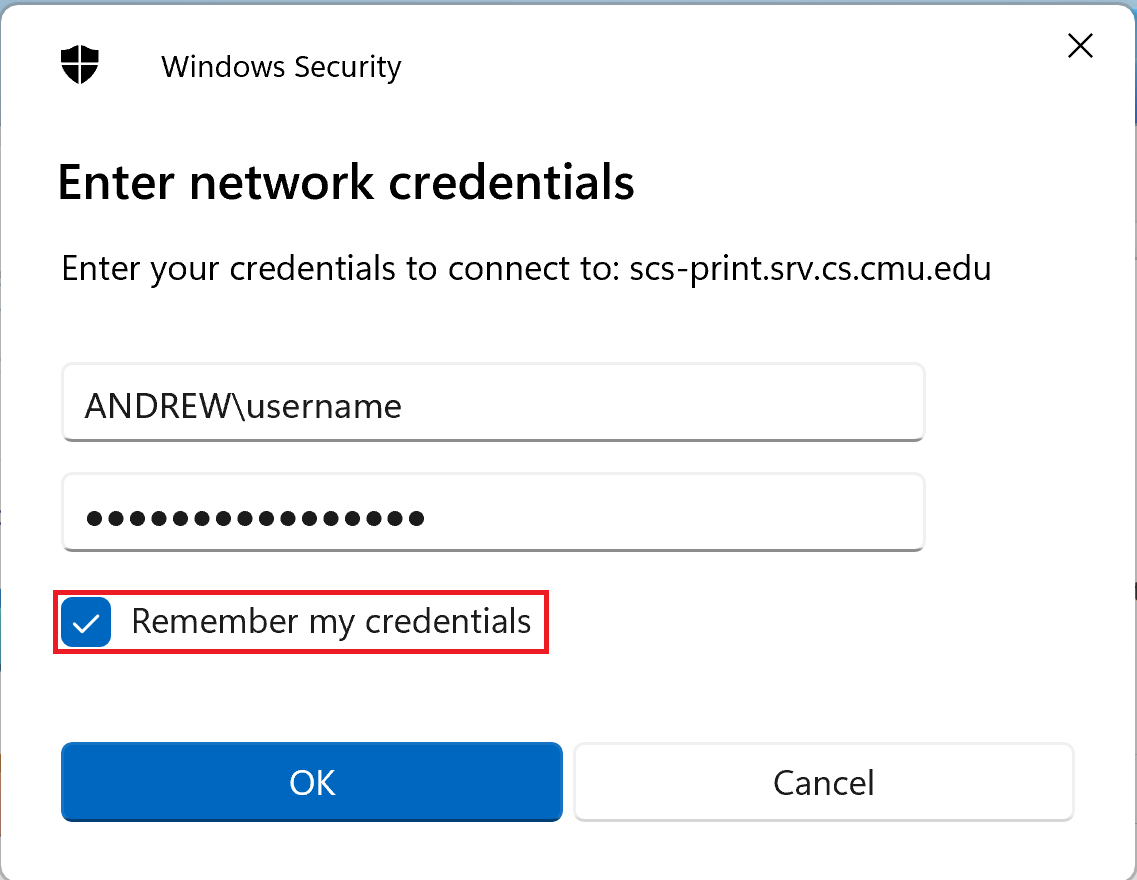
- A request for a user name and password will be prompted.
- Enter ANDREW\username and your AndrewID password.
- Select the checkbox that says "Remember my credentials".
Once this drive is mapped, you can proceed with the rest of the steps.
-
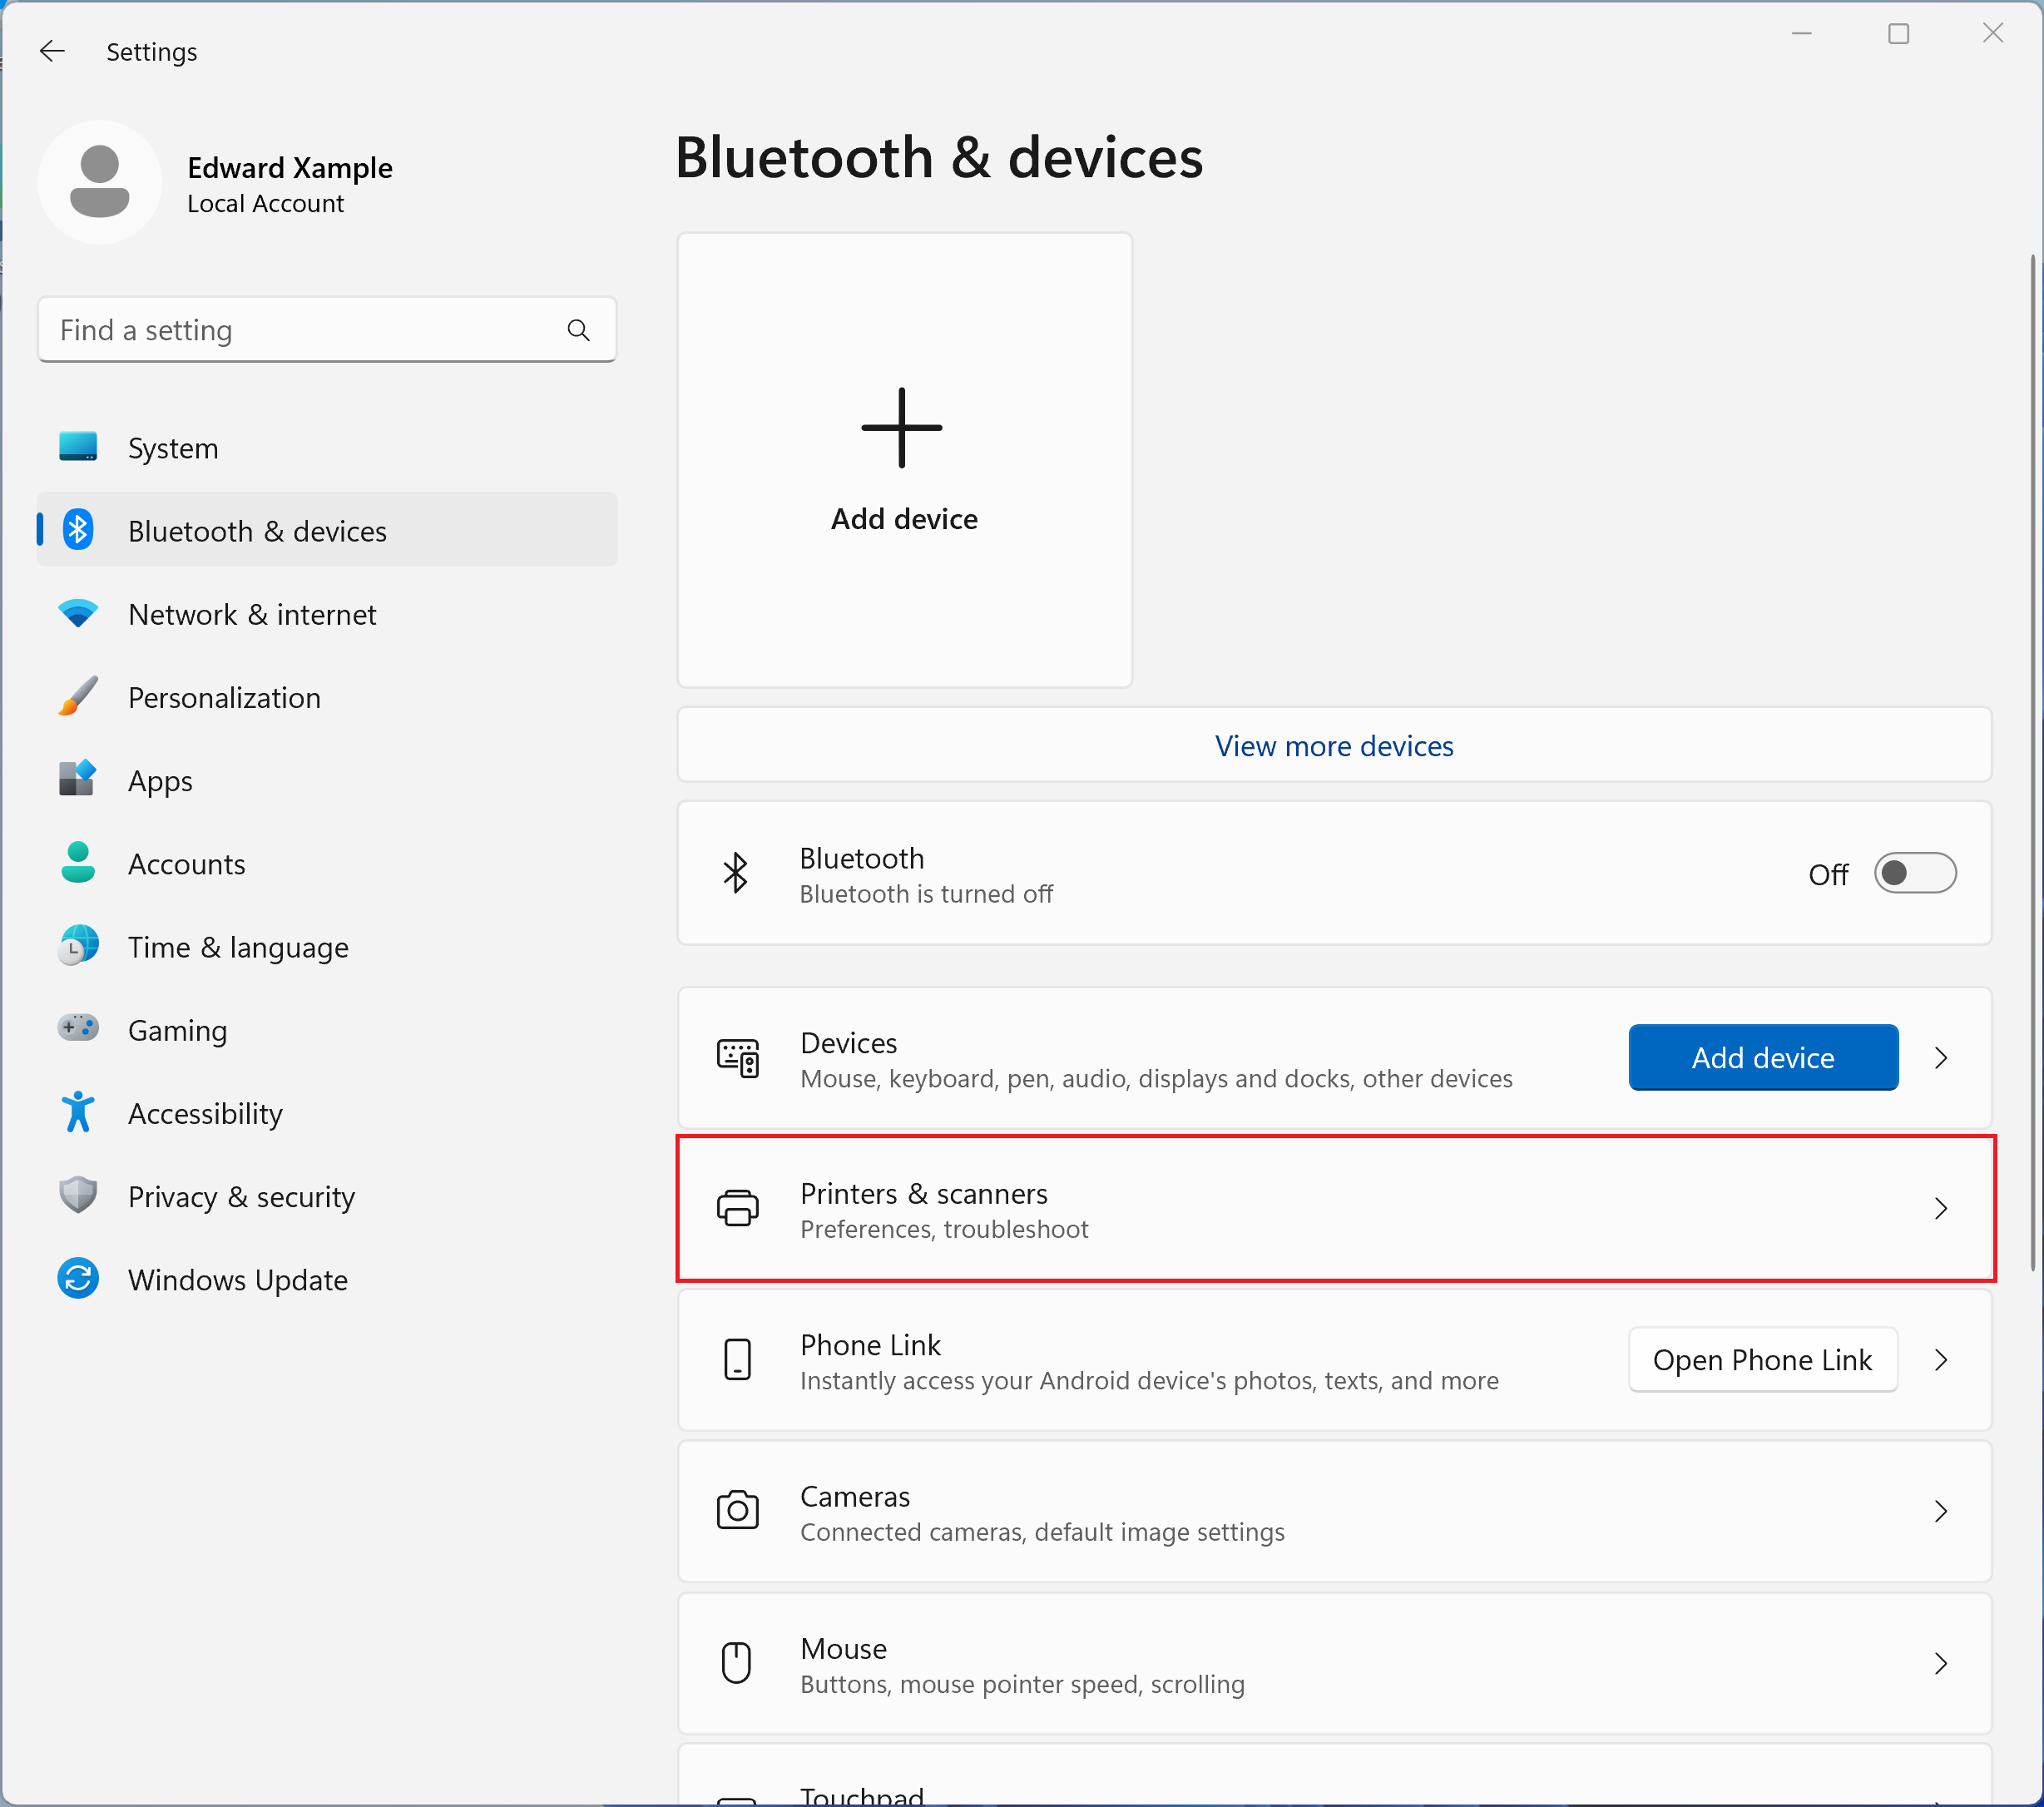
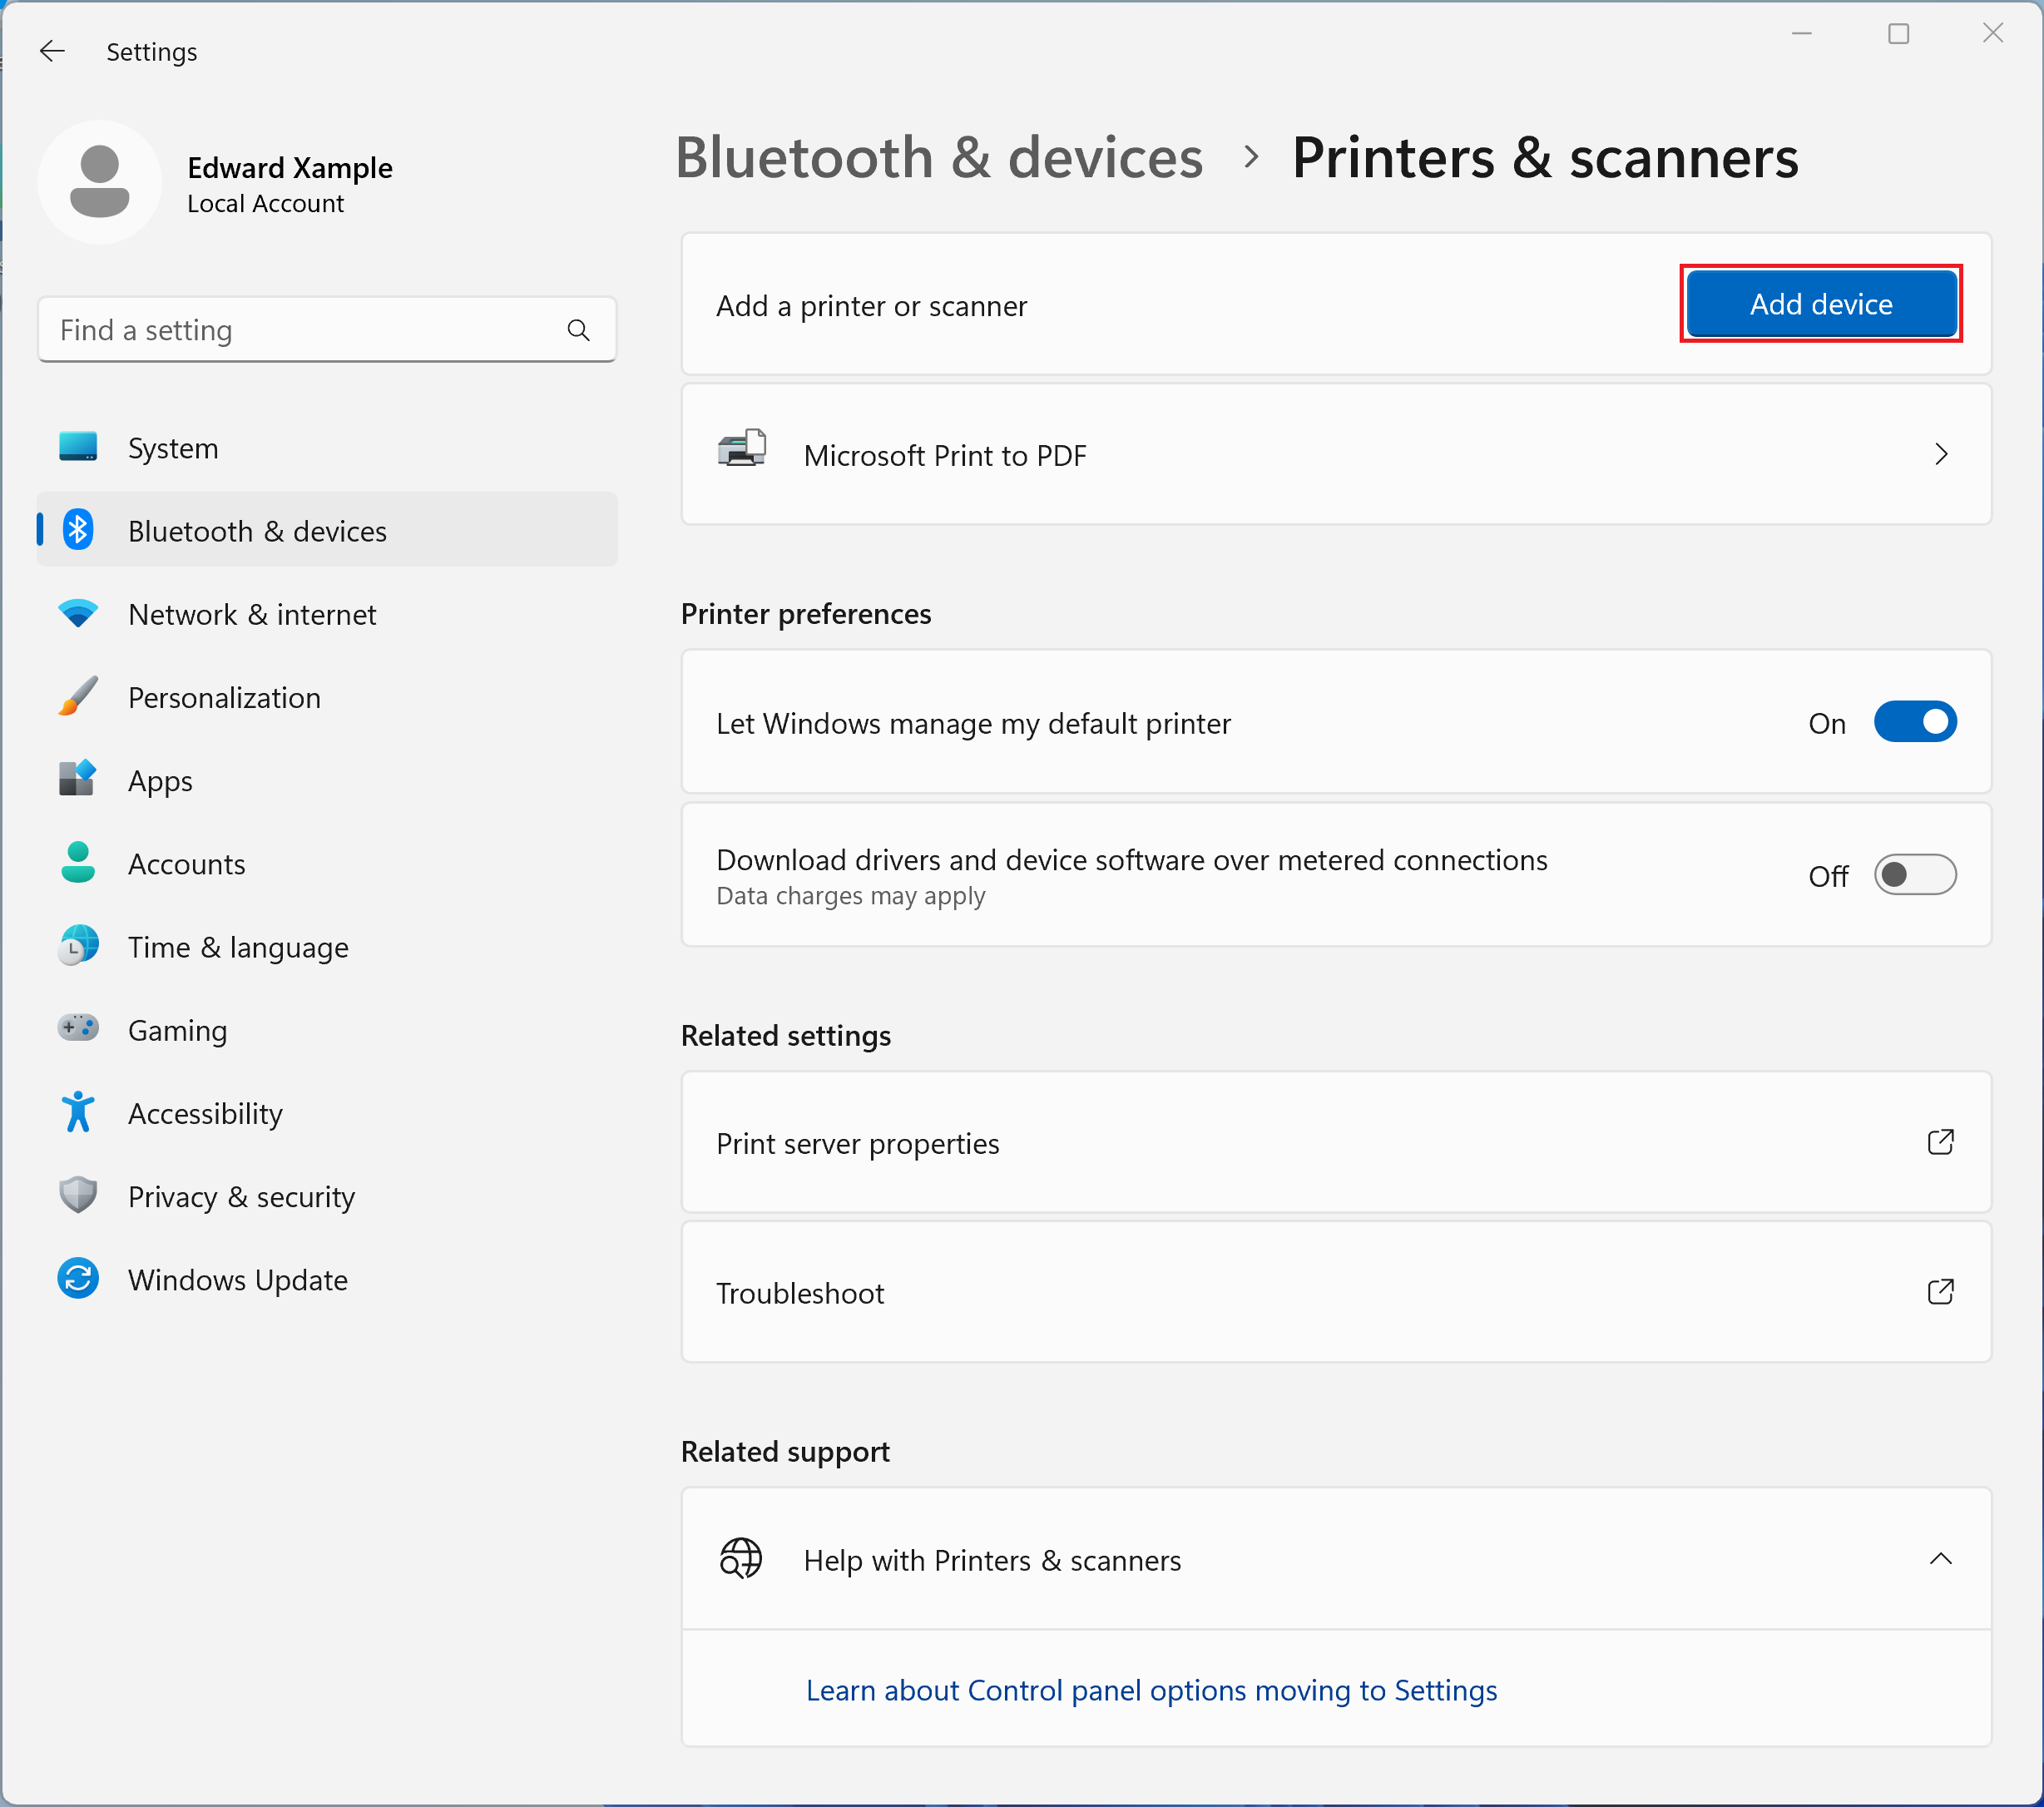
Open Bluetooth & devices -> Printers & scanners. (Found in Settings).
-
Next to Add a printer or scanner at the top of the window, click Add device.
-
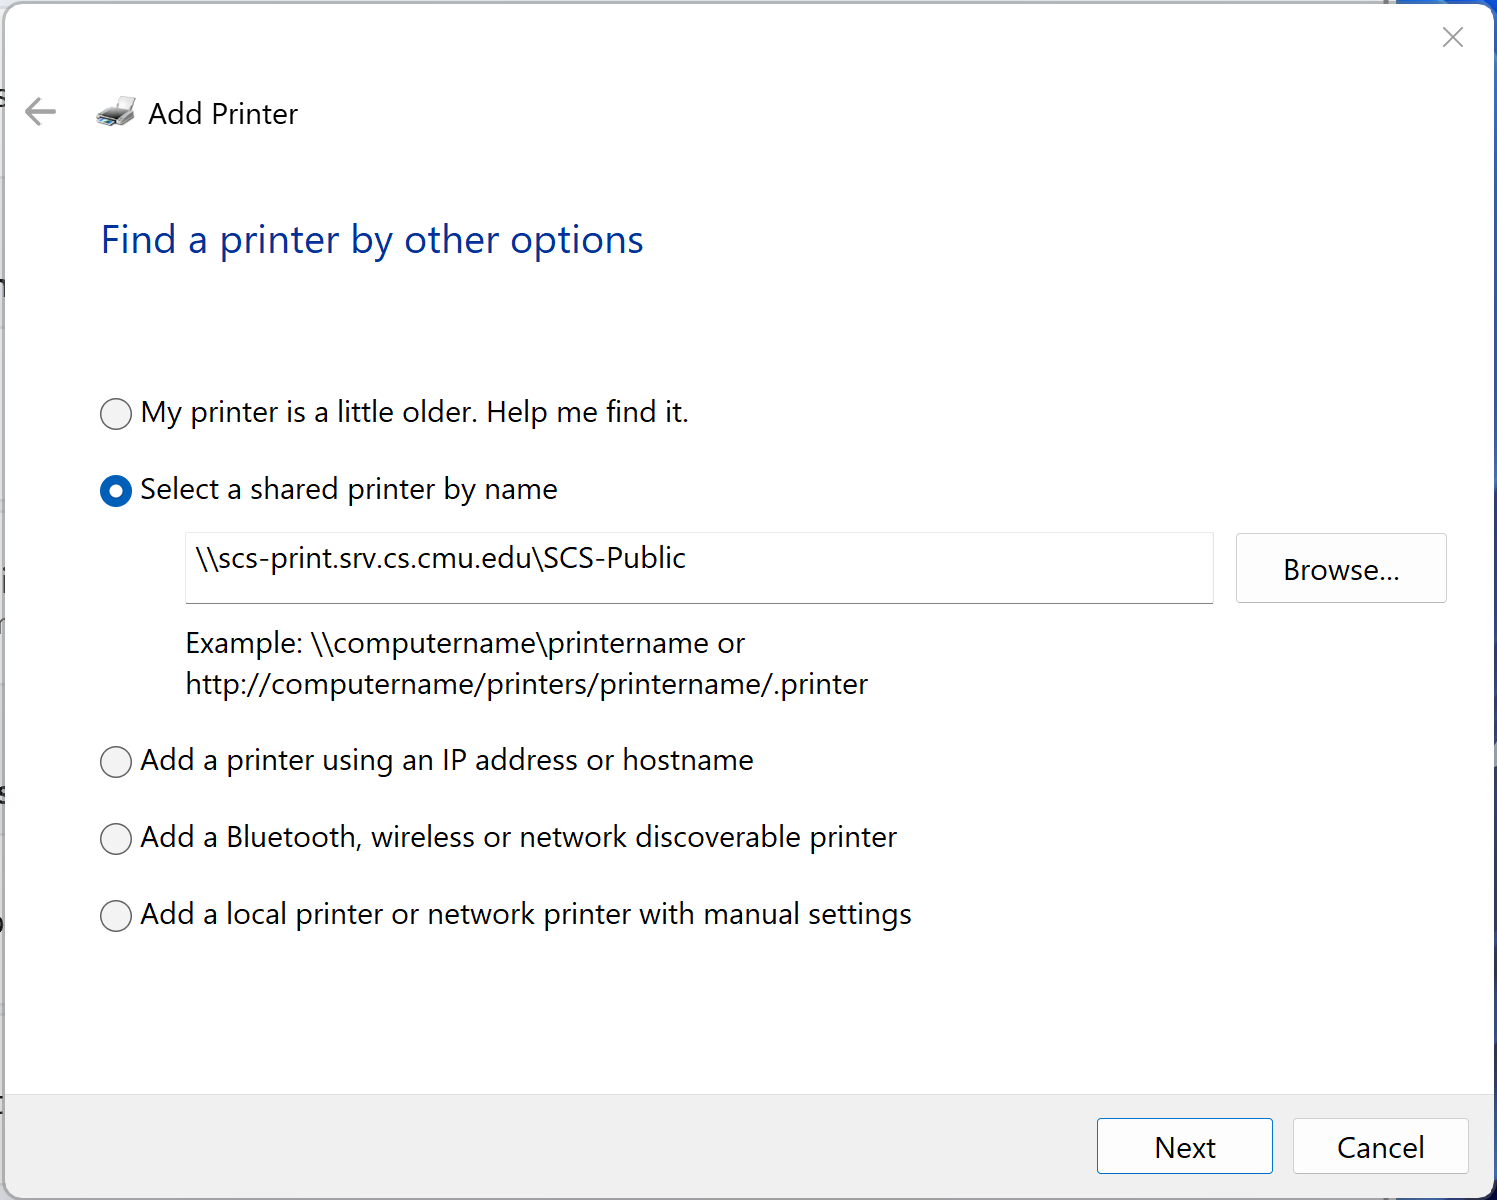
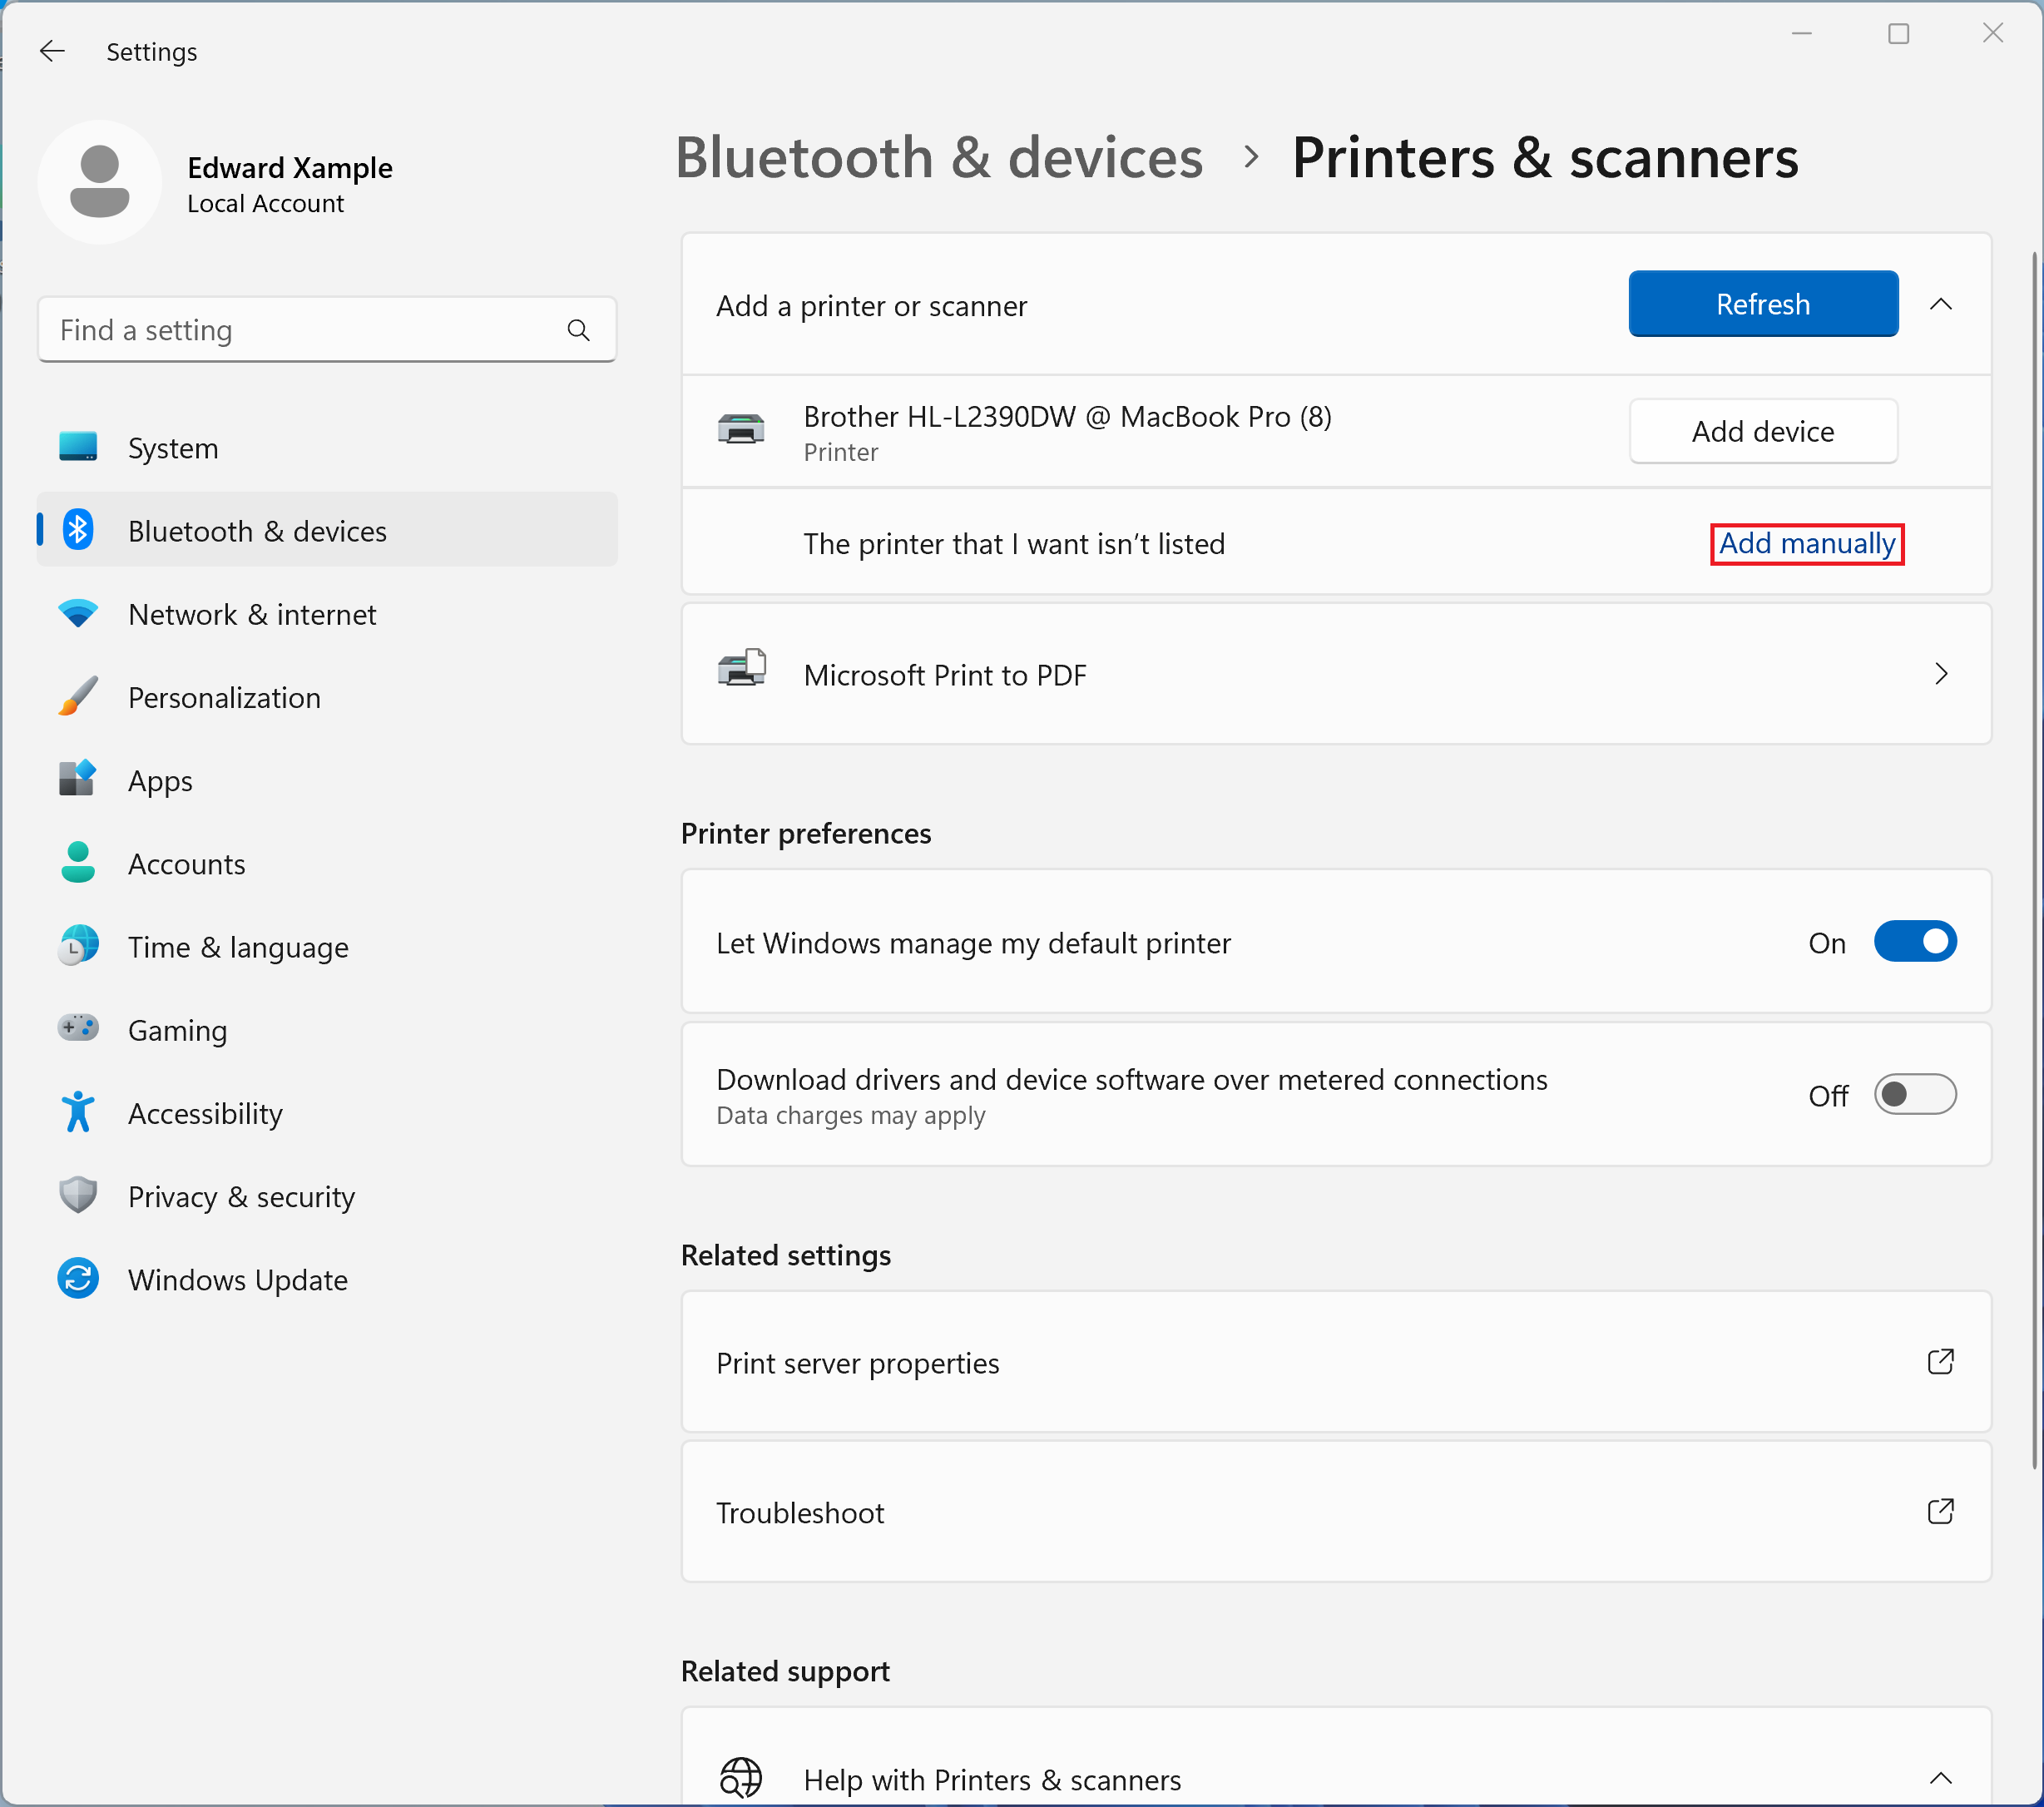
Next to The printer that I want isn't listed, click Add manually.
-
Click Next
If you are printing from a personal (non-SCS managed computer), you may be prompted for authentication. If so, use:
Username: ANDREW\Your Andrew ID
Password: Your Andrew password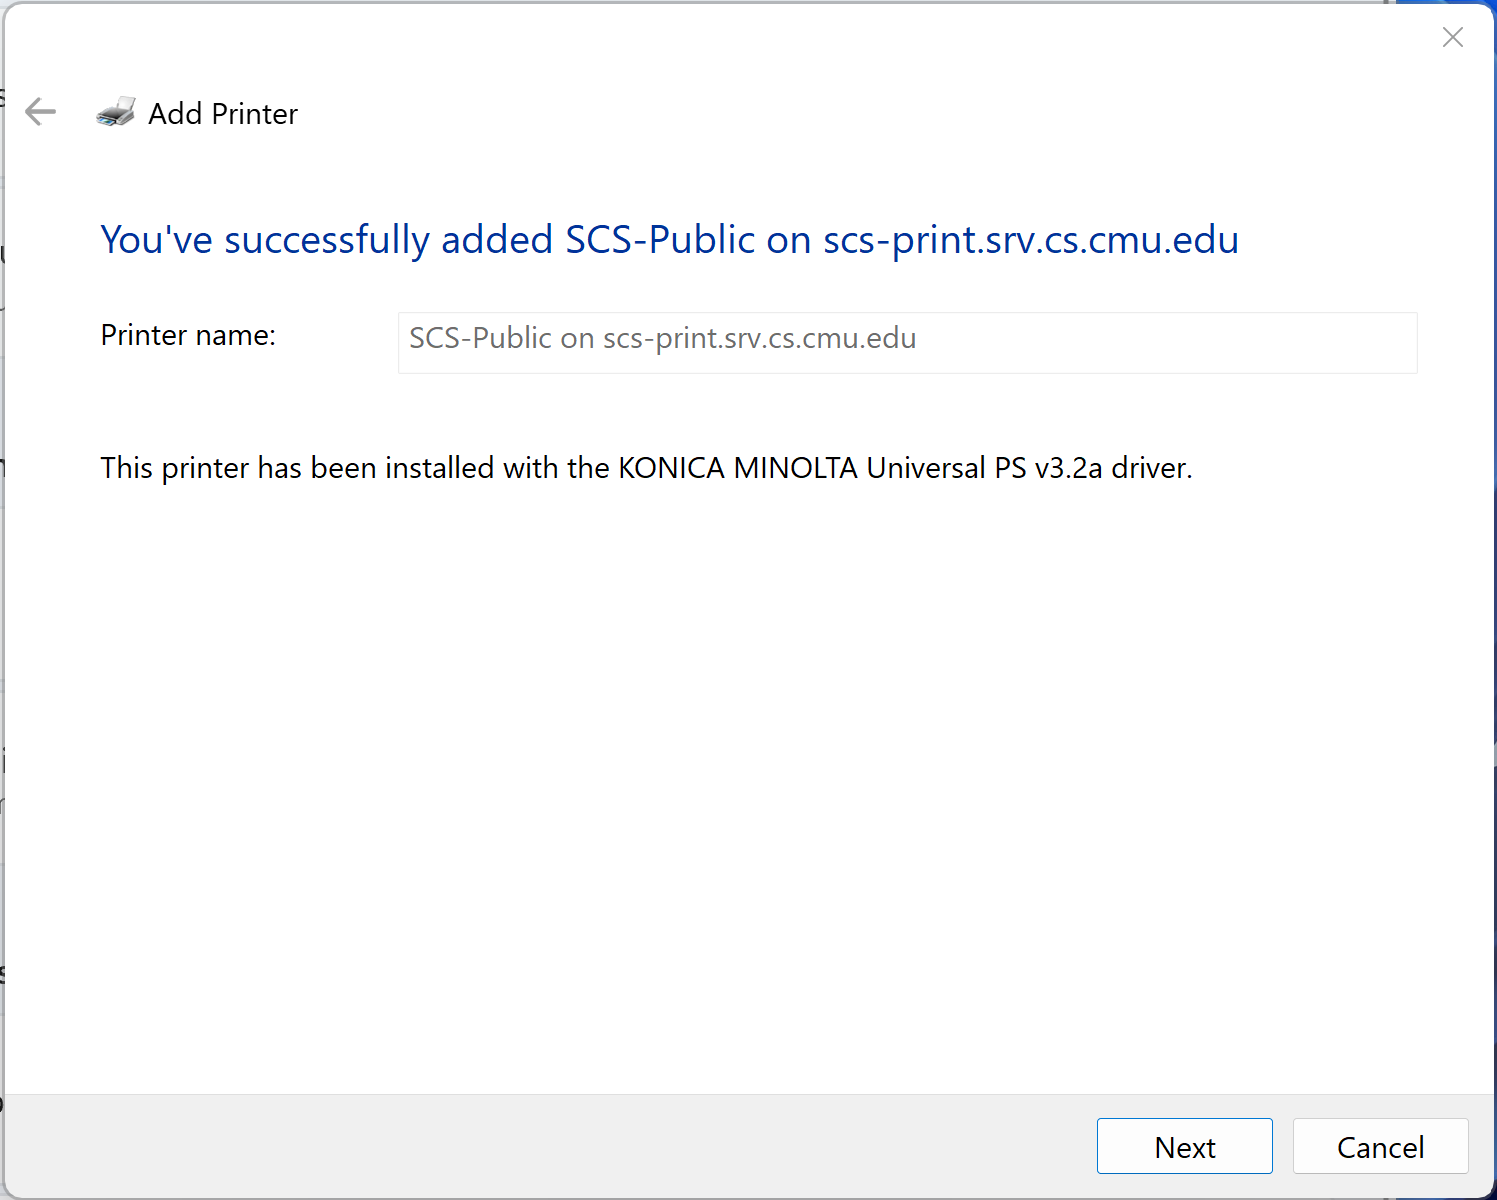
-
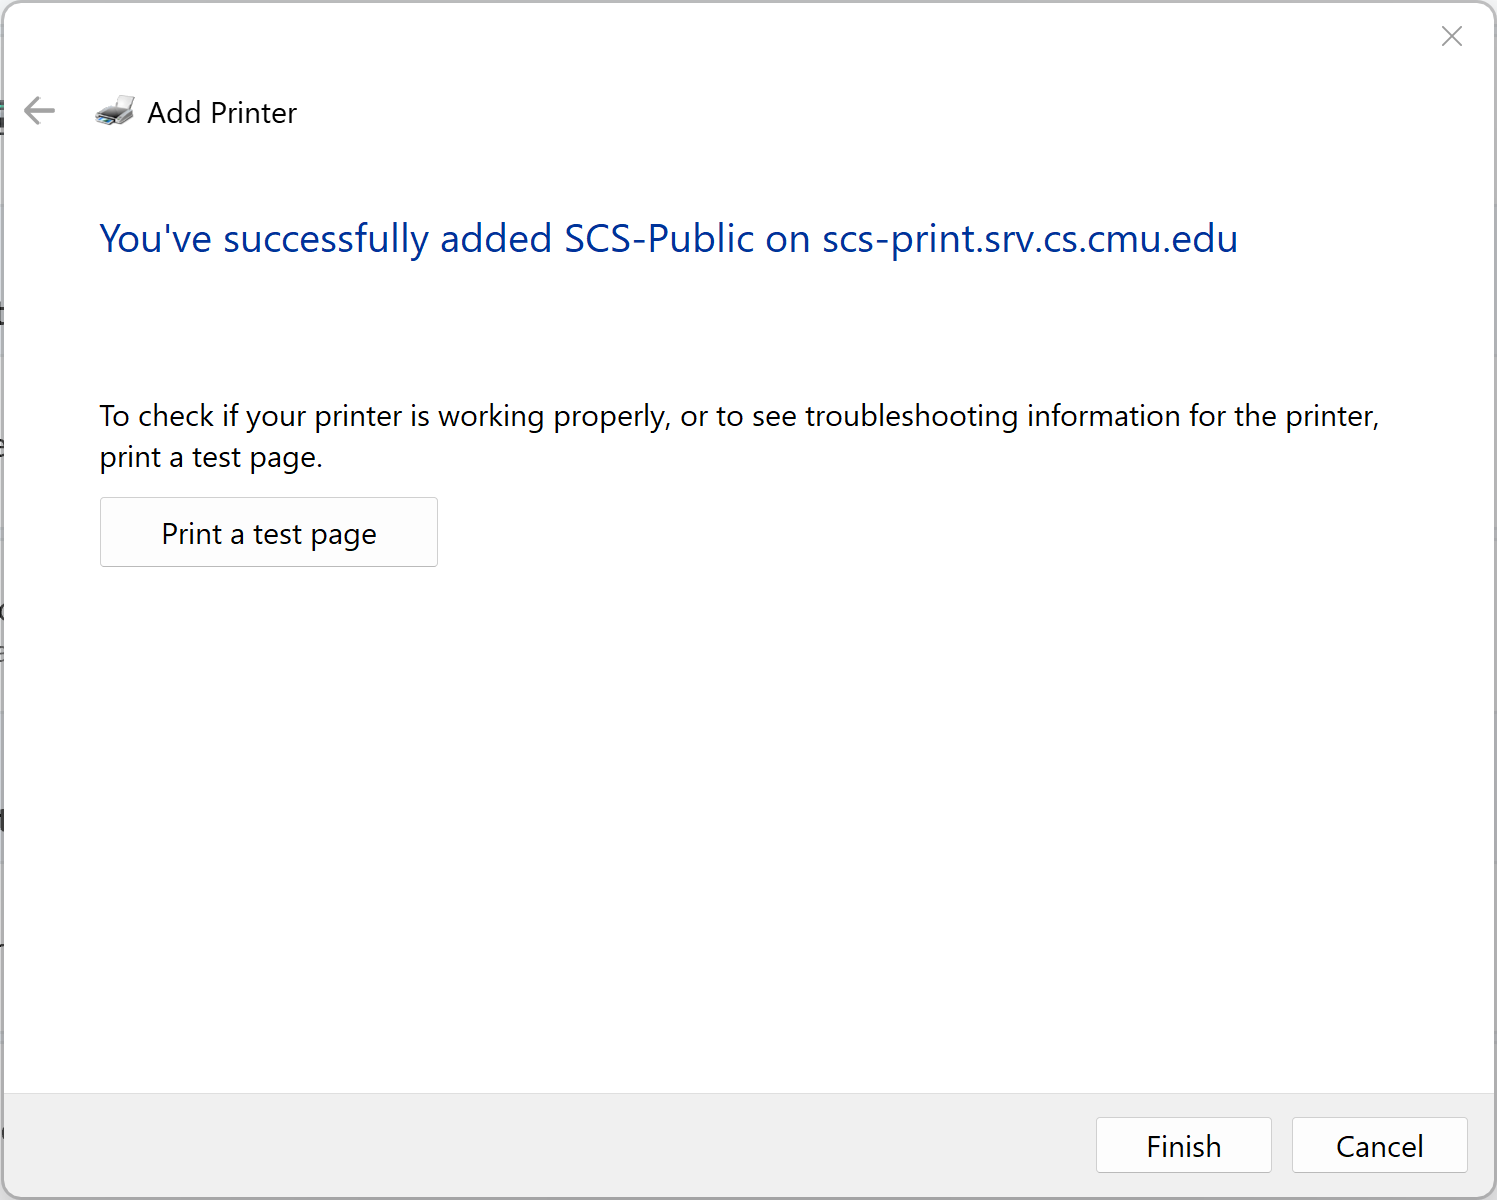
Click Finish
Need Help?
Was this page helpful?
Use this box to give us feedback on this webpage and its content. If you need a response, please include your Andrew ID.
Need technical support? Submit a ticket
